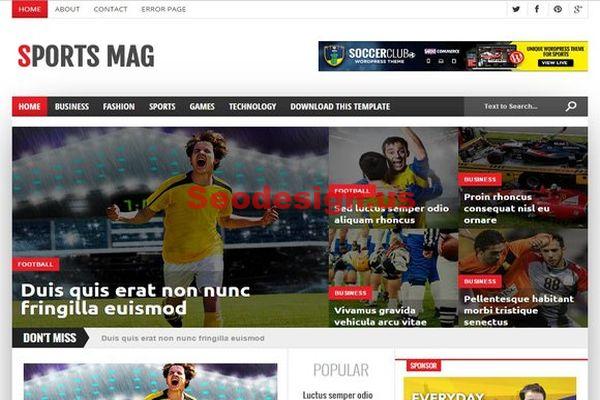
Nowday the jquery slideshow for featured posts are more and more used on websites and blogs. Today we will show you how to add the jquery slider to any blogger layout template that you use. In this tutorial we share an advanced slider that has some awesome effects added to it. You can navigate between images and the slideshow has opacity plus slice image effects.
– Go To Blogger > Design
– Choose Add a Page Element
– Then choose HTML/JavaScript widget
– Inside the widget add this code :
<script src="http://ajax.googleapis.com/ajax/libs/jquery/1.4.2/jquery.min.js" type="text/javascript"></script>
<script src="http://nivo.dev7studios.com/scripts/nivo-slider/jquery.nivo.slider.pack.js" type="text/javascript"></script>
<script type="text/javascript">
$(window).load(function() {
    $('#slider').nivoSlider();
});
</script>
<style>
#slider {
    position:relative;
}
#slider img {
        position:absolute;
    top:0px;
    left:0px;
    display:none;
}
#slider a {
    border:0;
    display:block;
}
.nivo-controlNav {
    position:absolute;
    left:260px;
    bottom:-42px;
}
.nivo-controlNav a {
    display:block;
    width:22px;
    height:22px;
    background:url(https://4.bp.blogspot.com/_7wsQzULWIwo/TQ-dlkBU2zI/AAAAAAAADME/t3LPHO0VCso/s400/bullets.png) no-repeat;
    text-indent:-9999px;
    border:0;
    margin-right:3px;
    float:left;
}
.nivo-controlNav a.active {
    background-position:0 -22px;
}
.nivo-directionNav a {
    display:block;
    width:30px;
    height:30px;
    background:url(https://3.bp.blogspot.com/_7wsQzULWIwo/TQ-dlGeZ32I/AAAAAAAADL0/R3v8bZsCtqo/s400/arrows.png) no-repeat;
    text-indent:-9999px;
    border:0;
}
a.nivo-nextNav {
    background-position:-30px 0;
    right:15px;
}
a.nivo-prevNav {
    left:15px;
}
.nivo-caption {
    text-shadow:none;
    font-family: Helvetica, Arial, sans-serif;
    font-size:16px;
    padding: 10px 0px;
}
.nivo-caption a {
    color:#efe9d1;
    text-decoration:underline;
}
.clear {
    clear:both;
}
.nivoSlider {
    position:relative;
}
.nivoSlider img {
    position:absolute;
    top:0px;
    left:0px;
}
.nivoSlider a.nivo-imageLink {
    position:absolute;
    top:0px;
    left:0px;
    width:100%;
    height:100%;
    border:0;
    padding:0;
    margin:0;
    z-index:60;
    display:none;
}

.nivo-slice {
    display:block;
    position:absolute;
    z-index:50;
    height:100%;
}
.nivo-caption {
    position:absolute;
    left:0px;
    bottom:0px;
    background:#000;
    color:#fff;
    opacity:0.7; /* Overridden by captionOpacity setting */
    width:100%;
    z-index:89;
}
.nivo-caption p {
    padding:5px;
    margin:0;
}
.nivo-caption a {
    display:inline !important;
}
.nivo-html-caption {
    display:none;
}

.nivo-directionNav a {
    position:absolute;
    top:45%;
    z-index:99;
    cursor:pointer;
}
.nivo-prevNav {
    left:0px;
}
.nivo-nextNav {
    right:0px;
}
.nivo-controlNav a {
    position:relative;
    z-index:99;
    cursor:pointer;
}
.nivo-controlNav a.active {
    font-weight:bold;
}
</style>
<div id="slider">

<img src="URL Of Image" alt="" title="Description Goes Here" />
<img src="URL Of Image" alt="" title="Description Goes Here" />
<img src="URL Of Image" alt="" title="Description Goes Here" />
<img src="URL Of Image" alt="" title="Description Goes Here" />
<img src="URL Of Image" alt="" title="#htmlcaption" />
</div>
<!—Write Descriptoon With Links In this Part—>
<div id="htmlcaption" class="nivo-html-caption">
Nice ! Now Learn How to create one by <a href="http://wwww.seodesign.us">Clicking here</a>
</div>
You are done, if you would like to add more than 4 images just duplicate this code :
<img src="URL Of Image" alt="" title="Description Goes Here" />
as more as you want to!


