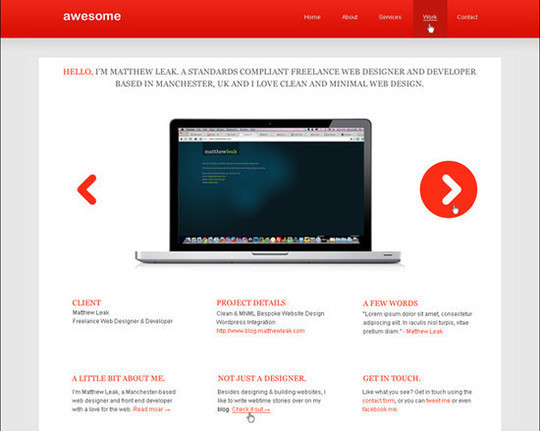
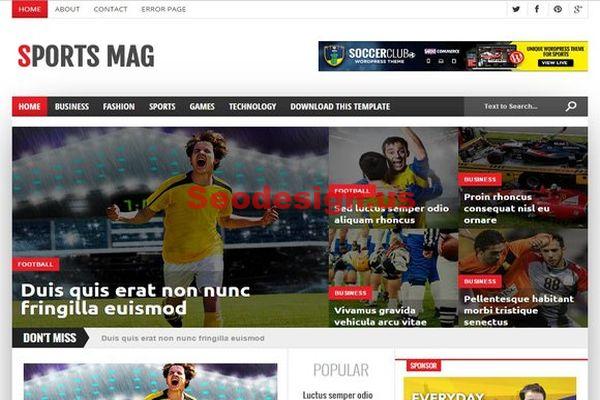
On this quit tutorial, we will show you how to convert photoshop PSD to WordPress theme template. All what we need is Photoshop, Your PSD file, last version of Bootstrap and some codes.
Open your PSD file and start slicing it, as we can’t code a theme from a single image, we will dividing an image file into multiple image files which contains different elements of the design.
Convert Photoshop PSD To WordPress Theme
Now, go to the bootstrap official website, download and extract the archive on a folder called “MyTheme“, you will get this files : css, fonts and js, we will use them after.

Next step is to code the sliced elements into HTML, then style them with CSS coding. Create a files index.html and a style.css into the folder MyTheme, open the index.html and add this code on it:
<!DOCTYPE html>
<html lang="en">
<head>
<meta charset="utf-8">
<meta name="viewport" content="width=device-width, initial-scale=1.0">
<link href="http://netdna.bootstrapcdn.com/bootstrap/3.0.3/css/bootstrap.min.css" rel="stylesheet" media="screen">
</head>
<body>
<script src="https://ajax.googleapis.com/ajax/libs/jquery/1.11.3/jquery.min.js"></script>
<script src="http://netdna.bootstrapcdn.com/bootstrap/3.0.3/js/bootstrap.min.js"></script>
</body>
</html>
Let’s add some elemnets such a Menu and pictures:
<!DOCTYPE html>
<html lang="en">
<head>
<meta charset="utf-8">
<meta name="viewport" content="width=device-width, initial-scale=1">
<link href="http://netdna.bootstrapcdn.com/bootstrap/3.0.3/css/bootstrap.min.css" rel="stylesheet" media="screen">
</head>
<body>
<div class="container-fluid">
<div class="navbar">
<a class="navbar-brand" href="#">My Website Name</a>
<ul class="nav navbar-nav pull-right">
<li><a href="#">Home</a></li>
<li><a href="#">About us</a></li>
<li><a href="#">Services</a></li>
<li><a href="#">Order Now</a></li>
<li><a href="#">Contact us</a></li>
</ul>
</div>
<div class="row">
<div class="col-sm-6 col-md-4">
<div class="thumbnail">
<img src="https://seodesign.us/image1.png">
<div class="caption">
<h3>About us</h3>
<p>...</p>
<p><a href="#" class="btn btn-primary" role="button">Read More</a></p>
</div>
</div>
</div>
<div class="col-sm-6 col-md-4">
<div class="thumbnail">
<img src="https://seodesign.us/image2.png">
<div class="caption">
<h3>Projects</h3>
<p>...</p>
<p><a href="#" class="btn btn-primary" role="button">Read More</a></p>
</div>
</div>
</div>
<div class="col-sm-6 col-md-4">
<div class="thumbnail">
<img src="https://seodesign.us/image3.png">
<div class="caption">
<h3>Services</h3>
<p>...</p>
<p><a href="#" class="btn btn-primary" role="button">Order Now</a></p>
</div>
</div>
</div>
<hr>
<footer>
<p>© SeoDesign.us 2016</p>
</footer>
</div>
<script src="https://ajax.googleapis.com/ajax/libs/jquery/1.11.3/jquery.min.js"></script>
<script src="http://netdna.bootstrapcdn.com/bootstrap/3.0.3/js/bootstrap.min.js"></script>
</body>
</html>
Now, we will create the CSS style, open the file style.css and add this code on it :
[css]
.navbar {
background:#000000;
margin-bottom:0px;
border-radius:0px;
}
.navbar-brand {
color:#FFFFFF;
line-height: 50px;
padding-left: 10px;
}
a.navbar-brand:hover {
color:#FFEB3B;
}
.navbar ul {
padding-right:4%;
}
.navbar ul li a {
color:#FFFFFF;
margin-right:10%;
}
.navbar ul li a:hover {
color:#222222;
background-color: yellow;
}
a.btn-primary{
background-color: #E91E63;
color:#FFFFFF;
}
To get our style to work, we will include it on our html file, so our head will lok like this :
<head>
<meta charset="utf-8">
<meta name="viewport" content="width=device-width, initial-scale=1">
<link href="http://netdna.bootstrapcdn.com/bootstrap/3.0.3/css/bootstrap.min.css" rel="stylesheet" media="screen">
<link href="/css/style.css" rel="stylesheet" media="screen">
<link href=”css/bootstrap.min.css” rel=”stylesheet” media=”screen”>
</head>
If you open the index.html on your web browser, you will get something like this :

The next step is to convert our index.html code to simple WordPress theme. To doing that we have to create a php files which compose the WordPress Structure : header.php, footer.php, index.php, sidebar.php, search.php and other files :
We start with the header.php where we add this lines :
<!DOCTYPE html>
<html lang="en">
<head>
<meta charset="utf-8">
<meta http-equiv="X-UA-Compatible" content="IE=edge">
<meta name="viewport" content="width=device-width, initial-scale=1">
<link href="/css/style.css" rel="stylesheet" media="screen">
<link href="/css/bootstrap.min.css" rel="stylesheet" media="screen">
</head>
<body>
<div class="container-fluid">
<div class="navbar">
<a class="navbar-brand" href="#">My Website Name</a>
<ul class="nav navbar-nav pull-right">
<li><a href="#">Home</a></li>
<li><a href="#">About us</a></li>
<li><a href="#">Services</a></li>
<li><a href="#">Order Now</a></li>
<li><a href="#">Contact us</a></li>
</ul>
</div>
Now open the index.php file and add this lines:
<div class="row">
<div class="col-sm-6 col-md-4">
<div class="thumbnail">
<img src="https://seodesign.us/image1.png">
<div class="caption">
<h3>About us</h3>
<p>...</p>
<p><a href="#" class="btn btn-primary" role="button">Read More</a></p>
</div>
</div>
</div>
<div class="col-sm-6 col-md-4">
<div class="thumbnail">
<img src="https://seodesign.us/image2.png">
<div class="caption">
<h3>Projects</h3>
<p>...</p>
<p><a href="#" class="btn btn-primary" role="button">Read More</a></p>
</div>
</div>
</div>
<div class="col-sm-6 col-md-4">
<div class="thumbnail">
<img src="https://seodesign.us/image3.png">
<div class="caption">
<h3>Services</h3>
<p>...</p>
<p><a href="#" class="btn btn-primary" role="button">Order Now</a></p>
</div>
</div>
</div>
And open the footer.php file and add this lines:
<hr> <footer> <p>© SeoDesign.us 2016</p> </footer> </div> <script src="https://ajax.googleapis.com/ajax/libs/jquery/1.11.3/jquery.min.js"></script> <script src="http://netdna.bootstrapcdn.com/bootstrap/3.0.3/js/bootstrap.min.js"></script> </body> </html>
All what did is slicing the index.html file into header.php, index.php, footer.php and other necessary files according to WordPress theme structure and to make the things more easy you can find a simple great themes for blogs under WordPress and use one of them.
Here is the list of WordPress theme files that every theme should have : style.css, header.php, index.php, sidebar.php, footer.php, single.php, page.php, comments.php, 404.php, functions.php, archive.php, searchform.php, search.php and to know more about this, please read the official WordPress Theme Structure.
The final step is to tweak all our content on the php files by using the simple WordPress functions. On my exemple i use the bloginfo function to show the website title and url :
<a href="<?php bloginfo('url'); ?>" title="<?php bloginfo('name'); ?>" class="navbar-brand"><?php bloginfo('name'); ?></a>
And for menu, i use the wp_nav_menu( $args ) function :
<?php wp_nav_menu( array('menu' => 'Project Nav', 'menu_class','nav navbar-nav pull-right' )); ?>
Now, the header.php file look like this:
<?php
?><!DOCTYPE html>
<html <?php language_attributes(); ?> class="no-js">
<head>
<meta charset="<?php bloginfo( 'charset' ); ?>">
<meta name="viewport" content="width=device-width, initial-scale=1">
<?php wp_head(); ?>
</head>
<body <?php body_class(); ?>>
<div class="container-fluid">
<div class="navbar">
<a href="<?php bloginfo('url'); ?>" title="<?php bloginfo('name'); ?>" class="navbar-brand"><?php bloginfo('name'); ?></a>
<?php wp_nav_menu( array('menu' => 'Project Nav', 'menu_class','nav navbar-nav pull-right' )); ?>
</div>
The footer.php will look like this :
[php]
<?php?>
<footer>
<p>© SeoDesign.us 2016</p>
</footer>
</div>
<?php wp_footer(); ?>
</body>
</html>
Now, we will add some sidebar content on the index.php :
<?php
get_header(); ?>
<div class="row">
<?php dynamic_sidebar('sidebar-1'); ?>
<?php dynamic_sidebar('sidebar-2'); ?>
<?php dynamic_sidebar('sidebar-3'); ?>
<hr>
<?php get_footer(); ?>
Now we need to define sidebar-1, sidebar-2 and sidebar-3 in the functions.php file as follows:
function seodesigntheme_widgets_init() {
register_sidebar( array(
'name' => __( 'Widget Area', 'seodesigntheme' ),
'id' => 'sidebar-1',
'description' => __( 'Add widgets here to appear in your sidebar.', 'seodesigntheme' ),
'before_widget' => '<aside id="%1$s" class="widget %2$s">',
'after_widget' => '</aside>',
'before_title' => '<h2 class="widget-title">',
'after_title' => '</h2>',
)
register_sidebar( array(
'name' => __( 'Widget Area', 'seodesigntheme' ),
'id' => 'sidebar-2',
'description' => __( 'Add widgets here to appear in your sidebar.', 'seodesigntheme' ),
'before_widget' => '<aside id="%1$s" class="widget %2$s">',
'after_widget' => '</aside>',
'before_title' => '<h2 class="widget-title">',
'after_title' => '</h2>',
)
register_sidebar( array(
'name' => __( 'Widget Area', 'seodesigntheme' ),
'id' => 'sidebar-3',
'description' => __( 'Add widgets here to appear in your sidebar.', 'seodesigntheme' ),
'before_widget' => '<aside id="%1$s" class="widget %2$s">',
'after_widget' => '</aside>',
'before_title' => '<h2 class="widget-title">',
'after_title' => '</h2>',
)
);
}
add_action( 'widgets_init', 'seodesigntheme_widgets_init' );
This will register three widget areas in WordPress dashboard, where we can add the HTML code for each image in sidebar-1, sidebar-2 and sidebar-3 widgets respectively :
<div class="col-sm-6 col-md-4">
<div class="thumbnail">
<img src="https://seodeign.us/image1.png">
<div class="caption">
<h3>About</h3>
<p>...</p>
<p><a href="#" class="btn btn-primary" role="button">Read More</a></p>
</div>
</div>
</div>
And so on!
The last thing is to load our stylesheets. This can be done by using wp enqueue style () in the function.php file :
// Load the main stylesheet
wp_enqueue_style( ''seodesigntheme-style', get_stylesheet_uri() );

// Load Bootstrap stylesheet
wp_enqueue_style( 'seodesigntheme', get_template_directory_uri() . '/css/bootstrap.css');
Now just give a name to your theme, and upload it on your wp-content/theme/ folder. To know more about how to create a WordPress Theme please read here : Link


